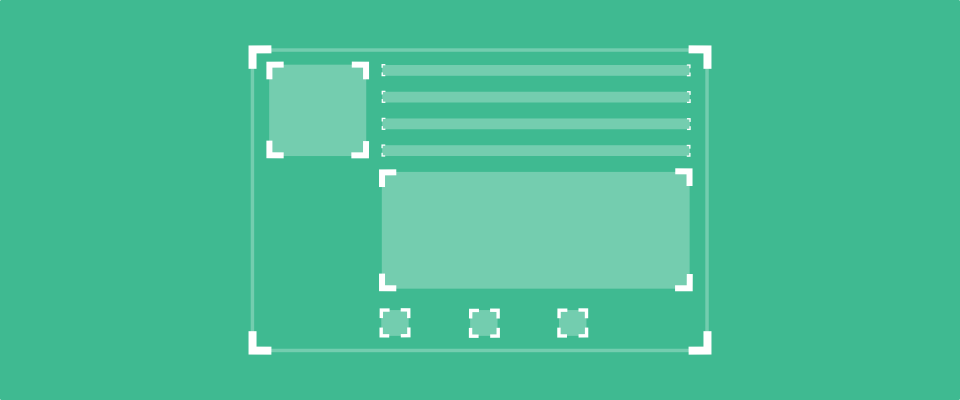
আমরা যে ভিউ গুলো যুক্ত করি লেয়াউটে, যেগুলো একটা ভিউগ্রুপে রাখতে হয়। আমদের প্রথমে অ্যাপে অ্যান্ড্রয়েড স্টুডিও ডিফল্ট ভাবে আমাদের ConstrainLayout ভিউগ্রুপ যুক্ত করে দিয়েছে। এই ConstrainLayout ছাড়াও আমরা আরো অনেক গুলো ভিউগ্রুপ ব্যবহার করতে পারি। যেমনঃ
- LinearLayout
- FrameLayout
- RelativeLayout
- GridLayout
- TableLayout
- CoordinatorLayout ইত্যাদি।
অ্যান্ড্রয়েড স্টুডিওতে একটি প্রজেক্ট তৈরি করে এই আর্টিকেলের কোড গুলো লেয়াউট ফাইলে এডিট মুডে পেস্ট করে ভিজুয়াল মুডে রেজাল্ট দেখতে পাবেন। আপনি চাইলে রান করেও দেখতে পারেন ইমিউলেটর বা ডিভাইসে কেমন দেখায়। লেখাটি পড়ে গেলে কিছু বোঝা যাবে না যদি কোড গুলো অ্যান্ড্রয়েড স্টুডিওতে রান না করে দেখা হয়।
অ্যান্ড্রয়েড স্টুডিওতে এখন ডিফল্ট ভাবে কনস্ট্রেইন্ট লেয়াউট যুক্ত করে দেয়। অ্যান্ড্রয়েড কনস্ট্রেইন্ট লেয়াউট সম্পর্কে বিস্তারিত জানা যাবে এখান থেকে।
লিনিয়ার লেয়াউটঃ
লিনিয়ার লেয়াউটে ভিউ গুলো পাশা পাশি বা নিচে নিচে রাখা যায়। যেমন নিচের গুলো গুলো দেখিঃ
<?xml version="1.0" encoding="utf-8"?>
<LinearLayout xmlns:android="http://schemas.android.com/apk/res/android" android:layout_width="match_parent" android:layout_height="match_parent" android:orientation="vertical" >

    <TextView android:id="@+id/text" android:layout_width="wrap_content" android:layout_height="wrap_content" android:text="Hello, I am a TextView" />

    <Button android:id="@+id/button" android:layout_width="wrap_content" android:layout_height="wrap_content" android:text="Hello, I am a Button" />

</LinearLayout>
android:orientation=”vertical” দিয়ে বলে দেওয়া হয়েছে এটি একটি ভার্টিক্যাল লিনিয়ার লেয়াউট। এর ভেতরের ভিউ গুলো একটার নিচে আরেকটা থাকবে।
<?xml version="1.0" encoding="utf-8"?>
<LinearLayout xmlns:android="http://schemas.android.com/apk/res/android" android:layout_width="match_parent" android:layout_height="match_parent" android:orientation=" horizontal" >

    <TextView android:id="@+id/text" android:layout_width="wrap_content" android:layout_height="wrap_content" android:text="Hello, I am a TextView" />

    <Button android:id="@+id/button" android:layout_width="wrap_content" android:layout_height="wrap_content" android:text="Hello, I am a Button" />

</LinearLayout>
আমরা যদি লিনিয়ার লেয়াউটের অরিয়েন্টেশন হরিজন্টাল করে দেই, তাহলে এর ভেতরের ভিউ গুলো পাশা পাশি থাকবে।
আমরা চাইলে একটা লিনিয়ার লেয়াউটের ভেতর আরেকটা লিনিয়ার লেয়াউট যুক্ত করতে পারি। যেমনঃ
<?xml version="1.0" encoding="utf-8"?>
<LinearLayout xmlns:android="http://schemas.android.com/apk/res/android" android:layout_width="match_parent" android:layout_height="match_parent" android:orientation="vertical" >
<LinearLayout android:layout_width="wrap_content" android:layout_height="wrap_content" android:orientation="horizontal">
<TextView android:layout_width="wrap_content" android:layout_height="wrap_content" android:text="Hello, I am a TextView" />
<Button android:layout_width="wrap_content" android:layout_height="wrap_content" android:text="Hello, I am a Button" />
</LinearLayout>
</LinearLayout>
FrameLayout
ফ্রেমলেয়াউটে একটা ভিউ যুক্ত করার জন্য ব্যবহার করা হয়। একাদিক ভিউ যুক্ত করলে একটা উপর একটা ওভারলেপ করবে। একাদিক ভিউ যুক্ত করলে ভিউ গুলোর পজিশন layout_gravity দিয়ে সেট করে দেওয়া যায়।
<FrameLayout xmlns:android="http://schemas.android.com/apk/res/android" android:layout_width="fill_parent" android:layout_height="fill_parent">

    <ImageView android:src="@mipmap/ic_launcher" android:scaleType="fitCenter" android:layout_height="fill_parent" android:layout_width="fill_parent"/>

    <TextView android:id="@+id/textView" android:layout_width="fill_parent" android:layout_height="fill_parent" android:gravity="center" android:text="Hello, I am a text view!" android:textSize="30px" android:textStyle="bold" />
</FrameLayout>
RelativeLayout
লিনিয়ার লেয়াউট এবং ফ্রেমলেয়াউটের তুলনায় RelativeLayout অনেক কমপ্লিকেটেড লেয়াউট। এখানে অনেক অ্যাট্রিভিউট ব্যবহার করা যায়। রিলেটিভলেয়াউট দিয়ে অনেক কমপ্লেক্স লেয়াউট তৈরি করা যায়।
<?xml version="1.0" encoding="utf-8"?>
<RelativeLayout xmlns:android="http://schemas.android.com/apk/res/android" android:layout_width="fill_parent" android:layout_height="wrap_content">

    <TextView android:id="@+id/label" android:layout_width="fill_parent" android:layout_height="wrap_content" android:text="Email" />

    <EditText android:id="@+id/inputEmail" android:layout_width="fill_parent" android:layout_height="wrap_content" android:layout_below="@id/label" />

    <Button android:id="@+id/btnLogin" android:layout_width="wrap_content" android:layout_height="wrap_content" android:layout_alignParentLeft="true" android:layout_below="@id/inputEmail" android:layout_marginRight="10px" android:text="Login" />

    <Button android:layout_width="wrap_content" android:layout_height="wrap_content" android:layout_alignTop="@id/btnLogin" android:layout_toRightOf="@id/btnLogin" android:text="Cancel" />

    <Button android:layout_width="wrap_content" android:layout_height="wrap_content" android:layout_alignParentBottom="true" android:layout_centerHorizontal="true" android:text="Register new Account" />
</RelativeLayout>
এখানে অনেক গুলো ভিউ যুক্ত করা হয়েছে। যেমন এডিটটেক্সট, বাটন ইত্যাদি। ইউজার এক্সপেরিয়েন্স যেন ভালো হয়, সে জন্য সেভাবে বাটন গুলোর পজিশন সেট করা হয়েছে। এর থেকেও কমপ্লেক্স UI আমরা রিলেটিভ ভিউ দিয়ে তৈরি করতে পারি।
GridLayout
GridLayout এ আমরা ভিউ গুলো গ্রিড আকারে সাজাতে পারি। আমরা বলে দিতে পারি কয়টা রো হবে, কয়টা কলাম হবে। গ্রিড ভিউতে আমরা চাইলে xml থেকে ভিউ গুলো যুক্ত করতে পারি আবার ListAdapter ব্যবহার করে জাভা কোড থেকে ডাইনামিক্যালিও জেনারেট করতে পারি। এখানে xml থেকে ভিউ গুলো যুক্ত করে একটা 2*2 গ্রিড এর উদাহরণ দেওয়া হয়েছেঃ
<GridLayout xmlns:android="http://schemas.android.com/apk/res/android" android:id="@+id/GridLayout1" android:layout_width="wrap_content" android:layout_height="wrap_content" android:orientation="horizontal" android:columnCount="2" android:rowCount="2">

    <Button android:id="@+id/button1" android:layout_gravity="left|top" android:text="Button" />

    <Button android:id="@+id/button2" android:layout_gravity="left|top" android:text="Button" />

    <Button android:id="@+id/button3" android:layout_gravity="left|top" android:text="Button" />

    <Button android:id="@+id/button4" android:layout_gravity="left|top" android:text="Button" />
</GridLayout>
TableLayout
টেবিললেয়াউটে ভিউ গুলো আমরা কলাম এবং রো অনুযায়ী সাজাতে পারি। এটা গ্রিডলেয়াউট থেকে একটু আলাদা হচ্ছে এই টেবিললেয়াউট। এখানে আমরা চাইলে এক এক রোতে এক বা একাধিক ভিউ যুক্ত করতে করতে পারি।
<TableLayout xmlns:android="http://schemas.android.com/apk/res/android" android:layout_width="match_parent" android:layout_height="match_parent">

    <TableRow android:layout_width="fill_parent" android:layout_height="wrap_content" android:gravity="center_horizontal">

        <TextView android:layout_width="match_parent" android:layout_height="wrap_content" android:text="Row 1" />
    </TableRow>


    <TableRow android:layout_width="fill_parent" android:layout_height="wrap_content" android:gravity="center_horizontal">

        <TextView android:layout_weight="1" android:gravity="center" android:text="Row 2 column 1" />

        <TextView android:layout_weight="1" android:gravity="center" android:text="Row 2 column 2" />
    </TableRow>

</TableLayout>
এখানে ব্যাসিক লেয়াউট গুলো সম্পর্কে লিখেছি। আমরা চাইলে নিজের মত করে লেয়াউট তৈরি করে নিতে পারি। আমাদের প্রজেক্টে যদি কমপ্লেক্স কোন লেয়াউটের দরকার হয়, তাহলে একটু গুগলে সার্চ করে নিব ঐরকম কোন লেয়াউট আছে কিনা। কারণ একটু খুঁজলেই দারুণ সব লেয়াউট পাওয়া যাবে। Android UI/UX libraries ও দেখতে পারি। দেখব কত সুন্দর সুন্দর ওপেনসোর্স ভিউ এবং লেয়াউট রয়েছে ব্যবহার করার জন্য।
অ্যান্ড্রয়েড অ্যাপ ডেভেলপমেন্ট শেখার জন্য সব গুলো আর্টিকেল পাওয়া যাবে এখানে।

really very nice post . thank you bro.
আপনি কি একটা app বানিয়ে দিতে পারেন